
How to Make Aloe Vera Gel at Home: A Safe, Step-by-Step Guide With Storage Tips
2026-09-14 • 5 min
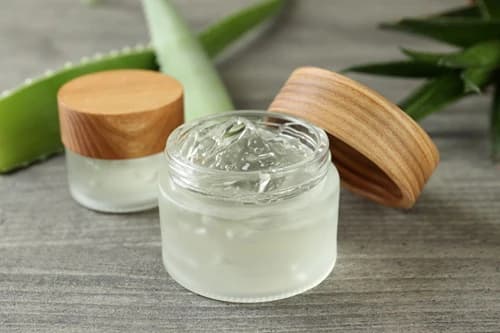
A fresh Aloe Vera leaf may seem nothing special, but inside it is the clear gel that has been valued in cultures for centuries. Once known as the “plant of immortality” in Ancient Egypt, Aloe Vera continues to be widely recognised for its personal care properties. If you are interested in how to make aloe gel at home, the trick is to know how to get the right part of the leaf and how to work with it correctly. You’ll discover the whole process, from preparing the leaf and collecting the gel, to how to handle and store it properly.
The History and Science Behind Aloe Vera
For over 4,000 years, Aloe Vera has been valuable, with evidence of its use going back to ancient Egypt and other early civilisations. It became a staple for many cultures in traditional personal care regimens over the years.
The gel in its leaves is clear and is mostly water but contains naturally occurring complex sugars, vitamins, minerals, enzymes and antioxidants. These components help explainAloe Vera well-known soothing, cooling and moisturising effects.
Different Types ofAloe Vera Plants
There are hundreds of species of Aloe Vera, but barbadensis Miller is the most commonly associated with cosmetic and traditional applications. It’s characterised by its thick, fleshy leaves, serrated edges and transparent inner gel. Before the preparation of Aloe Vera gel, it is important to identify the plant correctly.
Medicinal Properties and Benefits
Aloe Vera is made up of several natural ingredients which give it various benefits in terms of cosmetics and health, and some of these include:
Deep Hydration
Heals Inflammation
Facilitates Skin Healing
Cooling Effect
Improves Hair Condition
Stronger Hair
Healthy Glow
Prevents Frizz
How To Make Aloe Vera Gel At Home?
Selecting the Right Aloe Vera Plant
Select a healthy Aloe Vera plant that is fully grown, with thick, fleshy leaves, and that shows no signs of being affected by disease. The outer leaves have high amounts of gel and can be cut away without harming the inner leaves.
Required Tools and Materials
Before you start preparing your Aloe Vera Gel, it is a good idea to make sure that you have all of the tools required for an easy and neat extraction:
Knife with sharp blades
Clean cutting board
Spoon
Glass jar
Blender
Strainer with fine mesh
Gloves
Safety Precautions and Considerations
To begin with, clean your hands and sanitise all the equipment, vessels and the working space. Yellow latex that is found on the inner side of Aloe Vera leaves has different compounds such as aloin. Make sure that the latex does not come into contact with the transparent gel.
Step-by-Step Extraction Process
Aloe Vera Leaf Harvest
Select healthy and mature outer leaves.
Using a sharp knife, cut off each leaf from its stem.
Place the cut leaves vertically in a container for the yellow latex to drain for 10-15 minutes.
Cleaning and Preparing the Leaves
The leaves must be thoroughly washed under flowing water to get rid of all traces of dirt; additionally need to be dried using a clean cloth, and the teeth need to be removed.
Extraction of the Gel
Carefully remove the outer green layer.
Take a clean spoon and scoop out the clear inner gel.
Try not to scrape down to the yellow layer beneath the rind.
Pour the clear gel into a clean container.
This simple method outlines how to make aloe vera gel at home with minimal contamination from leaf rind and yellow latex.
Removing Yellow Latex
The yellow latex contains aloin and related compounds that should be kept separate from homemade topical gel. Let the cut leaves drain before extraction and carefully remove the clear gel from the rind to minimise contact with the latex. Discard any gel that is still a noticeable yellow colour, or that is contaminated by latex.
Processing the Gel
For a smoother consistency:
Transfer the extracted gel to a clean blender.
Blend briefly until it reaches an even consistency.
Strain through a fine mesh if necessary.
Immediately transfer it to a clean, airtight container.
Storage and Preservation
Natural Preservation Considerations
The preservatives used by professionals for their homemade gels are different from those found in commercially prepared cosmetic products. Some people add ingredients like vitamin E to their homemade gel, but you cannot consider it a substitute for a well-validated preservative. That is why making small quantities and staying hygienic is the safer way to make homemade gel.
Storage Containers and Conditions
Store freshly prepared aloe vera gel in:
A clean, airtight container
A refrigerator
A container protected from unnecessary light exposure
Small portions to reduce repeated contamination
Since homemade aloe vera gel contains water, it will spoil. Refrigerate immediately. Discard if it changes colour, smell, texture or look. For longer storage, it is also useful to freeze small portions in a clean ice-cube tray.
If you’re wondering how to make aloe vera gel at home for long-term storage, freezing individual portions is usually more practical than using DIY additives to keep fresh aloe vera gel stable for several months.
Uses and Applications
Skincare Applications
Fresh Aloe Vera is commonly added to skincare routines because of its lightweight and cooling texture. It may be used to:
Moisturise the skin
Soothe mildly dry or irritated skin
Provide a cooling sensation after sun exposure
Support comfortable-looking skin
Create simple face masks
For those who want to know how to make aloe vera gel at home for face, I suggest testing the product on a small area of skin before using it. If you have sensitive or allergic skin, stop using the product if you feel a rash, burning, itching, or swelling.
Hair Care Uses
Aloe Vera Gel can also be applied to the scalp or hair as part of a regular hair-care routine. Its water-rich texture may help:
Keep your scalp hydrated
Dry hair problems
Improve hair texture
Prevent frizz
Make your scalp feel fresh
Usage Guidelines
Homemade Aloe Vera Gel for skin care should be considered since Aloe Vera latex can contain compounds like aloin that could cause gastrointestinal effects. Similarly, liver balance products and multivitamin gummies should be evaluated based on their ingredients, intended purpose, recommended serving, and individual suitability rather than assuming that all natural or supplemental products are suitable for everyone.
DIY Beauty Combinations
Fresh Aloe Vera may be included in any basic preparation, along with other appropriate skin care ingredients. Some possibilities are:
Aloe Vera with honey to make a moisturising mask
Aloe Vera with cucumber for a cooling effect
Aloe Vera as an hair mask
Just Aloe Vera as a light skin application
Common Mistakes to Avoid
Failure to remove the yellow latex
Employing damaged and unhealthy leaves
Exposing too much of the rind
Allowing freshly prepared gel to stay too long
Using dirty implements
Believing that home-made ingredients preserve
Conclusion
How to make aloe vera gel at home for long time is easy to learn. It is a simple process, but following each step carefully can make a big difference to the final result. Making it yourself also gives you more control over how the gel is processed and stored after extraction. This is more than a hobby; it's an opportunity to experiment with using a fresh Aloe Vera leaf to make a finished product and recognise the importance of the plant's long-standing popularity.
FAQ
1. How do you make aloe vera gel at home from fresh leaves?
Wash a mature aloe leaf, drain the yellow latex, remove the green rind, and scoop out the clear inner gel. Blend briefly for a smoother consistency and transfer it to a clean container.
2. How do you safely remove the yellow latex from an aloe vera leaf?
After cutting the leaf, place it upright for about 10–15 minutes to allow the yellow latex to drain. Rinse the leaf and carefully separate the clear gel from the rind.
3. How long does homemade aloe vera gel last, and how should it be stored?
Homemade aloe gel is highly perishable because of its water content. Keep it refrigerated in a clean, airtight container and discard it immediately if you notice signs of spoilage.
4. Can homemade aloe vera gel be used on the face, hair, and body?
Yes, properly prepared aloe vera gel can be applied to the face, body, hair, and scalp for topical care. Patch-test it first, especially if you have sensitive skin.
5. Do you need preservatives to keep homemade aloe vera gel fresh?
Fresh aloe gel can be made without preservatives, but its shelf life will be limited. Refrigeration or freezing small portions is more practical than relying on untested DIY preservatives.
6. What are the most common mistakes to avoid when making aloe vera gel at home?
Common mistakes include leaving yellow latex in the gel, using damaged leaves or unclean equipment, and storing the gel improperly. Avoid keeping homemade gel after its appearance or smell begins to change.
7. How can you tell if homemade aloe vera gel has gone bad?
Changes in colour, smell, texture, or overall appearance can indicate spoilage. If the gel seems unusual or questionable, it is safest to discard it.
Share this article: